Ever wondered how to transform your living space without breaking the bank? With a little creativity and some everyday items, you can create stunning decor that reflects your personal style. DIY projects are not only cost-effective but also a fun way to add a unique touch to your home.
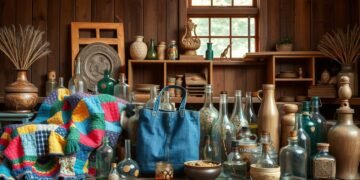
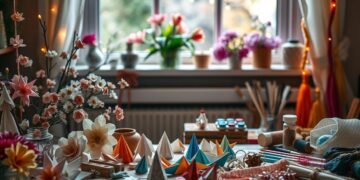
From repurposing old jeans to crafting with fabric scraps, the possibilities are endless. Glass jars, paper plates, and even toilet rolls can become beautiful pieces of art. These projects are perfect for beginners and kids, requiring minimal supplies and effort.
Since the pandemic, many have shifted toward intentional crafting, reducing shopping trips and focusing on sustainability. Whether it’s a Mod Podge photo collage or no-sew coasters, these ideas are designed to save you time and money. Dive into this list of 50+ creative ideas and start crafting today!
Key Takeaways
- Discover over 50 creative DIY decor ideas using household items.
- Save money by repurposing materials like old jeans and glass jars.
- Perfect for beginners and kids, with minimal supplies needed.
- Explore time-saving projects like 5-minute crepe paper flowers.
- Learn how to create versatile decor with paper plates and popsicle sticks.
Introduction to Budget-Friendly DIY Home Decor
Looking to refresh your space without spending a fortune? The shift to remote work during the pandemic sparked a surge in DIY projects. Many turned to crafting as a way to personalize their surroundings while reducing store trips. This trend continues today, with 83% of projects relying on household items like pill bottles and soda cans.
One of the biggest benefits of DIY decor is cost savings. For example, a photo collage project can cost as little as $20, while denim bunting requires just 2-3 old jeans. These ideas not only save money but also optimize space and unleash creativity. Functional decor, like desk organizers, and wall art, such as watercolor collages, are particularly popular.
Kid-friendly options, like paper plate marble mazes, make crafting a family activity. To get started, gather essential tools like Mod Podge, scissors, and paint. With minimal craft supplies and a little time, you can transform everyday items into stunning decor pieces.
Easy Painted Rocks for Decorative Accents
Transform ordinary rocks into stunning decorative pieces. Painted rocks are a versatile and affordable way to add charm to your space. Whether you’re creating garden markers or table centerpieces, this tutorial will guide you through the process.

Materials Needed for Painted Rocks
Gather smooth river rocks, acrylic paints, and a sealant spray. For an alternative technique, try Mod Podge decoupage. Non-toxic paints are perfect for family projects, ensuring safety for kids. These supplies are budget-friendly, with most items costing under $5.
Step-by-Step Instructions
Start by cleaning the rocks thoroughly. Once dry, use acrylic paints to create your designs. Seasonal patterns or inspirational quotes add a personal touch. For durability, apply an outdoor-grade sealant, especially for garden markers.
If you prefer decoupage, apply Mod Podge to attach paper designs. Let it dry completely before adding a protective coat. This tutorial offers 10 design variations to inspire your creativity.
Display your painted rocks in entryway arrangements or as table centerpieces. These handmade accents are not only beautiful but also cost-effective compared to store-bought decor. With these simple instructions, you can create unique art that reflects your style.
DIY Pom Pom Garland: A Festive Touch
Add a playful and colorful vibe to your space with a DIY pom pom garland. This project is perfect for adding a festive touch to any room or event. Whether you’re decorating for a baby shower, holiday mantel, or just want to brighten up your living area, this garland is a versatile and fun option.
Choosing the Right Colors
When selecting colors for your garland, consider the mood you want to create. Monochromatic schemes offer a sleek, modern look, while rainbow arrangements bring energy and vibrancy. Use yarn scraps for a sustainable approach or invest in new skeins for a polished finish.
Think about the space where the garland will hang. Soft pastels work well for nurseries, while bold hues can make a statement in living rooms. Don’t be afraid to mix and match for a unique craft that reflects your style.
How to Make Pom Poms
Creating pom poms is simple and requires minimal supplies. Start by wrapping yarn around a cardboard template or fork. For a kid-safe version, use cardboard templates instead of forks. Once wrapped, tie the center tightly and cut the loops to form the pom pom.
Experiment with size variations, from 1″ to 3″, to add visual interest. For a floral twist, incorporate yarn flowers into your garland. Attach the pom poms to twine, ribbon, or fishing line, depending on your desired look.
Store leftover garland for future use or repurpose it for gift wrapping. This list of ideas ensures your pom pom garland is both functional and decorative. With these tips, you’ll have a stunning garland ready for any occasion.
Create a Photo Collage with Mod Podge
Turn your favorite memories into a stunning wall display with a Mod Podge photo collage. This project is perfect for adding a personal touch to your space. Whether you’re using canvas, wood panels, or thrifted frames, the possibilities are endless.

Selecting Your Photos
Start by choosing photos that tell your story. Matte prints work best for a seamless finish, while glossy prints add a reflective touch. Layer vintage postcards with personal photos for a unique look. Magazine cutouts or concert tickets can also add variety to your collage.
Consider the theme of your art. Family portraits, travel snapshots, or abstract designs can all create a cohesive display. Spend time arranging your photos before applying Mod Podge to ensure the perfect layout.
Applying Mod Podge
Begin by applying a thin layer of Mod Podge to your surface. Place your photos carefully, smoothing out any bubbles as you go. Use a foam brush for even coverage. Once the first layer dries, add a top coat for durability.
For long-lasting results, use a UV-resistant sealant. This protects your collage from fading over time. Display your finished piece as a gallery wall focal point or in a standalone frame. This tutorial is a great way to create meaningful decor without spending a fortune.
Watercolor Collage Art for Beginners
Discover the joy of creating vibrant watercolor collages with minimal supplies. This beginner-friendly project allows you to express your creativity while adding a personal touch to your space. Whether you’re a seasoned artist or just starting, watercolor collage art is a versatile and rewarding activity.
Gathering Your Supplies
Start with budget-friendly materials like student-grade watercolors and mixed media paper. These supplies are affordable and perfect for experimenting with techniques. For added texture, gather salt, plastic wrap, and a fixative spray. These items will help you create unique effects in your collage.
Creating Your Collage
Begin by applying the rule of thirds to compose your art. This technique ensures a balanced and visually appealing layout. Experiment with textures by sprinkling salt or pressing plastic wrap onto wet paint. These methods add depth and interest to your design.
For framing, consider floating frames or canvas mounting. Floating frames highlight the edges of your paper, while canvas mounting gives a professional finish. To preserve your work, use a fixative spray or glass framing. These options protect your collage from fading over time.
Kid-friendly adaptations include using construction paper shapes or pre-cut designs. This makes the project accessible for younger artists. Explore thematic variations like abstract or landscape collages to suit your style. With these tips, you’ll create stunning watercolor collages that reflect your unique idea.
No-Sew Fabric Coasters: Vintage Style
Looking for a simple yet stylish way to protect your surfaces? No-sew fabric coasters are the perfect project for adding a vintage touch to your home. This tutorial will guide you through creating functional and decorative coasters using minimal supplies.
Choosing Your Fabric
Start by selecting fabric that matches your style. Old scarves, quilt scraps, or bandanas are excellent choices. For a vintage look, consider using tea towels or floral prints. These materials are not only budget-friendly but also add character to your coasters.
When comparing adhesives, Mod Podge and fabric glue both work well. Mod Podge offers a durable finish, while fabric glue provides a quicker drying time. Choose based on your preference and the materials you have on hand.
Assembling the Coasters
Cut your fabric into desired shapes, such as traditional squares or unique hexagons. For added functionality, attach cork backing to make the coasters heat-resistant. This step ensures they protect your surfaces effectively.
Personalize your coasters with monogram stenciling or seasonal themes like Christmas plaid or autumn leaves. These details make your project stand out and can even turn it into a makes great gift idea.
Package your finished coasters in raffia-tied sets for a thoughtful hostess gift. This tutorial is a great way to create something both practical and beautiful. With these tips, you’ll have a set of coasters that reflect your unique idea.
DIY Denim Bunting from Old Jeans
Upcycle old jeans into a charming denim bunting for your space. This project is perfect for adding a rustic touch to your home or special events. With just a few supplies, you can create a unique decoration that’s both functional and stylish.
Preparing Your Denim Scraps
Start by gathering 2-3 pairs of jeans. Old or thrifted jeans work perfectly for this craft. Cut the denim into triangles or rectangles, depending on your preferred design. Pinking shears or a rotary cutter can help achieve clean edges.
For added creativity, experiment with ombre bleaching techniques. This adds a modern twist to your bunting. Ensure the denim pieces are uniform in size for a polished look.
Creating the Bunting
Attach the denim pieces to twine, ribbon, or bias tape. Twine offers a rustic vibe, while ribbon adds a softer touch. Space the pieces evenly for a balanced appearance.
Personalize your bunting with fabric paint or embellishments. This list of ideas includes themes like Western parties or nursery decor. For outdoor use, consider weather-resistant materials to ensure durability.
Hang your finished bunting on walls, mantels, or fences. This versatile project is a great way to repurpose old jeans and add character to any space.
Conclusion: Start Your DIY Home Decor Journey Today
Ready to elevate your space with creative and budget-friendly ideas? DIY projects offer an average of 70% cost savings compared to retail decor. Whether it’s a photo collage, pom pom garland, or fabric coasters, these beginner-friendly options are perfect for starting your craft journey.
Repurposing materials is not only eco-friendly but also cost-effective. Over 65% of projects use recycled items, making them sustainable and unique. Share your creations on social media to inspire others and connect with a vibrant community of makers.
For your next steps, explore Mod Podge tutorials or rotate seasonal decor to keep your home fresh. These ideas also make great gifts for friends and family. Start today and transform your space with your own hands!
What’s your favorite project idea? Share in the comments below and check out our resource list for essential crafting blogs. Your creative journey begins now!
FAQ
What materials do I need for painted rocks?
You’ll need smooth rocks, acrylic paint, brushes, and a sealant like Mod Podge or clear spray paint.
How do I choose the right colors for a pom pom garland?
Pick colors that match your room’s theme or the occasion. Bright shades work for parties, while pastels suit a calm vibe.
Can I use any photos for a Mod Podge collage?
Yes, but choose high-quality prints or copies to avoid smudging. Personal photos or magazine cutouts work well.
What supplies are essential for watercolor collage art?
Gather watercolor paper, paints, brushes, scissors, and glue. Add embellishments like washi tape for extra flair.
How do I select fabric for no-sew coasters?
Choose durable, absorbent fabrics like cotton or linen. Vintage patterns or bold designs add character.
What’s the best way to prepare denim scraps for bunting?
Cut denim into triangles or rectangles, ensuring they’re uniform in size. Sand the edges for a worn, rustic look.