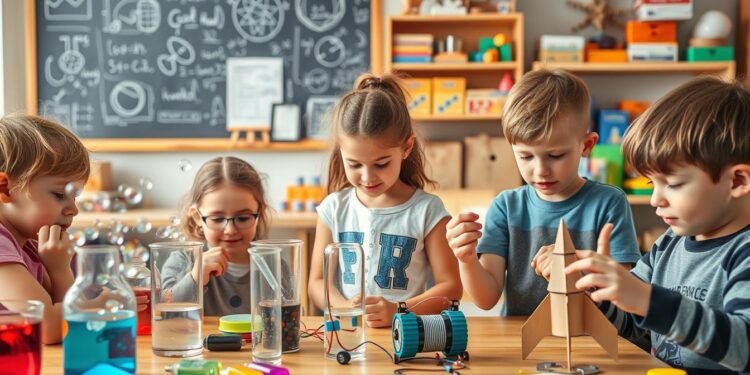
Have you ever wondered how to turn ordinary household items into exciting learning opportunities for your children? Science, technology, engineering, and math are all around us, and you don’t need a lab to explore these concepts. With just a few simple materials, you can create fun and educational activities that spark curiosity and creativity.
These hands-on experiments are designed to teach real-world principles in a way that’s both engaging and accessible. From building structures to exploring chemical reactions, each activity is tailored to help kids aged 3-11 understand complex ideas through play. Plus, they’re a great way to reduce screen time while fostering a love for learning.
Whether you’re making a cloud in a jar or crafting magnetic slime, these projects connect to school subjects like chemistry and physics. Backed by experts, they’re proven to enhance critical thinking and problem-solving skills. Ready to get started? Let’s dive into these 20 simple yet impactful ideas!
Key Takeaways
- Transform everyday materials into educational tools for children.
- Activities are designed for kids aged 3-11, making learning age-appropriate.
- Teach real-world scientific principles through hands-on experiments.
- Connect projects to subjects like chemistry, physics, and engineering.
- Provide a screen-free alternative for educational engagement.
Why STEM Projects at Home Are Important
Exploring science and engineering with your kids can be both fun and educational. Studies show that children exposed to hands-on activities develop cognitive skills 55% faster. These experiences lay the groundwork for future success in a world increasingly driven by technology.
Simple kitchen experiments, like mixing baking soda and vinegar, teach chemical reactions and fractions. These activities make abstract concepts tangible and relatable. They also encourage problem-solving and critical thinking, essential skills for real-world challenges.
National STEM Day, celebrated on November 8, highlights the importance of these subjects. It’s a reminder that 71% of future jobs will require literacy in science, technology, engineering, and math. Starting early ensures children are prepared for these opportunities.
Collaborative activities also strengthen family bonds. Working together on experiments fosters teamwork and communication. It’s a chance for parents to guide their children while nurturing their natural curiosity.
Children aged 3-5 are naturally inquisitive, while those aged 9-11 seek deeper understanding. Tailoring activities to these phases maximizes engagement. Programs like I’m the Chef Too! blend food and learning, proving that education can be both fun and impactful.
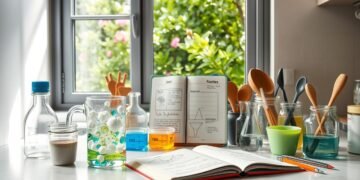
What You Need to Get Started
Simple household items can unlock a world of discovery for kids. You don’t need expensive tools or specialized kits to create engaging activities. In fact, 85% of the materials you’ll need are already in your kitchen or recycling bin.
Here’s a list of 10 essential items to have on hand: balloons, baking soda, straws, LED lights, vinegar, string, paper clips, rubber bands, aluminum foil, and empty plastic bottles. These versatile materials can be used for a variety of experiments.
Safety is important, especially when working with chemical reactions. Equip your home lab with goggles and gloves to protect little hands and eyes. Keep materials organized in labeled bins or drawers to make setup quick and easy.
Looking for budget-friendly options? Big Bang STEAM offers monthly kits with 500+ interactive lessons, but you can also create your own projects using everyday items. Whether you have 20 minutes or a few days, there’s something for every schedule.
Download a handy checklist to ensure you’re always prepared for the next learning adventure. With these tips, parents can turn ordinary moments into extraordinary opportunities for growth and fun.
1. Cloud in a Jar
Ever thought about how clouds form right before your eyes? This simple experiment brings the science of weather into your home. Using just a few everyday items, you can create a cloud in a jar and explore the water cycle in action.
Materials Needed
To get started, gather these items: a clear glass jar, hot water, ice cubes, a metal lid or plate, and hairspray. These materials mimic the natural conditions needed for cloud formation.
Steps to Create
First, pour hot water into the jar, filling it about one-third full. Quickly place the metal lid or plate on top and add a few ice cubes. Wait a minute, then spray a small amount of hairspray into the jar. Lift the lid slightly, and watch as a cloud forms inside!
Key Concepts Learned
This activity teaches kids about states of matter, atmospheric pressure, and precipitation basics. It also introduces different cloud types, like cumulus and stratus, and connects to broader topics like weather forecasting and climate change. For further reading, check out The Cloud Book by Tomie dePaola.
2. Sticky Note Number Match
Looking for a creative way to teach kids about numbers? The Sticky Note Number Match is a fun and interactive activity that helps children recognize numeric values and build basic arithmetic skills. Using everyday materials, this game makes learning math engaging and accessible.
Materials Needed
To get started, gather these simple items: sticky notes, a marker, and a flat surface like a wall or table. You’ll also need a list of numbers or equations, depending on your child’s skill level.
Steps to Create
First, write numbers or simple equations on the sticky notes. For younger kids, focus on single-digit numbers. For older children, include addition or subtraction problems. Place the sticky notes randomly on the surface.
Next, ask your child to match the numbers or solve the equations. Encourage them to explain their reasoning as they go. This step reinforces their understanding of numbers and builds confidence in their math abilities.
Key Concepts Learned
This activity aligns with Common Core standards K.CC.B.4, teaching number recognition and counting. It also introduces the number bonds methodology, helping kids understand how numbers relate to each other. Inspired by Montessori counting frameworks, it’s a hands-on way to explore foundational concepts in a playful setting.
3. Crystal Sun Catchers
Have you ever marveled at the beauty of crystals and wondered how they form? This activity introduces kids to the science of crystallization while creating stunning sun catchers. It’s a simple way to explore chemistry and molecular structure using everyday materials.
Materials Needed
Gather these items: pipe cleaners, borax powder, a glass jar, boiling water, and string. Pipe cleaners act as the base for crystal growth, while borax creates the solution needed for the process.
Steps to Create
First, shape the pipe cleaners into fun designs like stars or spirals. Tie them to a string and suspend them inside the jar. Next, mix borax powder into boiling water until it dissolves. Pour the solution into the jar, ensuring the pipe cleaners are fully submerged.
Let the jar sit undisturbed for 24 hours. As the water cools, crystals will form on the pipe cleaners. Once dry, hang your sun catchers near a window to catch the light.
Key Concepts Learned
This experiment teaches kids about molecular structure and how crystals form in nature. It parallels the formation of geodes and sedimentary rocks. You can also discuss how crystallization is used in pharmaceuticals to create medicines.
For a deeper dive, visit a natural history museum to see real-life examples of crystals. This activity connects science to art, making it both educational and visually rewarding.
4. Building a Hand Crank Winch
Discover how a simple hand crank winch can teach kids about engineering and physics. This hands-on activity introduces the basics of pulley systems, torque, and simple machines. It’s a fun way to explore how these concepts are used in real-world tools like construction cranes.
Materials Needed
Gather these items: a cardboard tube, string, a wooden dowel, a small bucket or container, and tape. These materials are easy to find and perfect for creating a functional winch.
Steps to Create
First, attach the wooden dowel to the cardboard tube to create the crank. Next, tie one end of the string to the dowel and the other end to the bucket. Secure the tube to a stable surface using tape. Turn the crank to lift the bucket, demonstrating how the winch works.
Key Concepts Learned
This activity teaches kids about pulley systems and how they reduce effort by distributing force. It also introduces torque, the rotational force that makes the crank turn. You can discuss Archimedes’ contributions to simple machines and even connect this project to Rube Goldberg machine designs for added creativity.
5. Magnetic Slime
What if you could create something that’s both gooey and magnetic? Magnetic slime is a fascinating way to explore the properties of non-Newtonian fluids and magnetic fields. This activity combines science and fun, making it a hit with kids and adults alike.
Materials Needed
To make magnetic slime, you’ll need liquid starch, white school glue, iron oxide powder, and a strong magnet. These materials are easy to find and safe for kids to use with supervision.
Steps to Create
First, mix the glue and liquid starch in a bowl until it forms a slime-like consistency. Add iron oxide powder and stir until fully incorporated. Knead the mixture with your hands until it becomes smooth and stretchy.
Next, test the slime by placing the magnet near it. Watch as the slime moves and stretches toward the magnet. This step demonstrates how magnetic fields interact with materials.
Key Concepts Learned
This experiment teaches kids about the physics of magnetism and the unique behavior of non-Newtonian fluids. It also introduces real-world applications, like MRI technology and ferrofluids used in spacecraft.
Safety is important—keep magnets away from small children to prevent ingestion. With proper supervision, this activity is a safe and exciting way to explore scientific principles.
6. Build-a-Bridge
What makes a bridge strong enough to hold heavy loads while standing tall for years? This activity introduces kids to the principles of engineering and physics through hands-on bridge building. Using simple materials, they’ll explore structural integrity, load distribution, and the balance between tension and compression.
Materials Needed
To get started, gather these items: popsicle sticks, glue, string, paper clips, and small weights like coins or washers. These materials are easy to find and perfect for creating a functional bridge model.
Steps to Create
First, plan the bridge design. Will it be a beam bridge, arch bridge, or suspension bridge? Next, use popsicle sticks and glue to build the base. Add string and paper clips to create tension if making a suspension bridge. Finally, test the bridge by placing small weights on it to see how much it can hold.
Key Concepts Learned
This activity teaches kids about structural integrity and how different designs handle weight. It also introduces the concepts of tension and compression, which are essential in physics and engineering. Compare your bridge to famous ones like the Golden Gate or Brooklyn Bridge to see how real-world engineers solve these challenges.
For older kids, discuss civil engineering careers and how math is used to calculate stress points in bridge designs. This project connects creativity with real-world applications, making learning both fun and impactful.
7. Build a Balloon Car
Ever wanted to turn a balloon into a moving car? This activity combines creativity with science to teach kids about motion and energy. Using simple materials, they’ll explore how air power can propel a vehicle forward.
Materials Needed
Gather these items: a plastic bottle, straws, bottle caps, a balloon, and tape. These everyday materials are perfect for creating a functional car that runs on air.
Steps to Create
First, attach the straws to the bottle to act as axles. Use the bottle caps as wheels. Next, tape the balloon to the top of the bottle, ensuring the opening faces backward. Blow up the balloon, then let it go to watch the car zoom forward.
Key Concepts Learned
This activity introduces kids to physics concepts like kinetic and potential energy. They’ll also learn about aerodynamics and friction, which affect how the car moves. Compare this to fuel-efficient vehicle designs to show real-world applications.
For older kids, discuss alternative propulsion systems and how they reduce environmental impact. You can also extend the activity by calculating speed and distance, adding a math component to the fun.
8. Build a Paper Rocket
What if you could launch a rocket right from your living room? This activity introduces kids to the physics of flight and the engineering behind rocket design. Using just paper and a few simple materials, they’ll explore how thrust, drag, and center of gravity work together to make a rocket soar.
Materials Needed
Gather these items: a sheet of paper, tape, scissors, a straw, and markers for decoration. These everyday materials are all you need to create a functional paper rocket.
Steps to Create
First, roll the paper into a tube and secure it with tape. Next, cut out fins from the remaining paper and attach them to the base of the rocket. Decorate the rocket with markers to make it unique. Finally, slide the straw into the rocket and blow through it to launch your creation into the air.
Key Concepts Learned
This activity teaches kids about thrust, the force that propels the rocket forward, and drag, the resistance that slows it down. They’ll also learn about the center of gravity, which helps the rocket stay balanced during flight. Compare this to SpaceX rocket designs to show how these concepts are used in real-world aerospace engineering.
Discuss how satellites are deployed into orbit and link this activity to the Apollo program, which first landed humans on the moon. This hands-on project connects creativity with science, making learning both fun and impactful.
9. Light-up Postcard
Ever imagined creating something that lights up with just a few simple materials? This activity combines art and technology to teach kids about electrical flow and how circuits work. It’s a creative way to explore the basics of electricity while making a unique keepsake.
Materials Needed
Gather these items: a piece of cardstock, copper tape, a small LED light, a coin cell battery, and markers or stickers for decoration. These materials are easy to find and perfect for creating a functional light-up postcard.
Steps to Create
First, fold the cardstock in half to create the postcard. Next, use copper tape to create a simple circuit on the inside. Attach the LED light and battery to complete the circuit. Decorate the front of the postcard with markers or stickers to make it unique.
Finally, press the battery to light up the LED. This step demonstrates how electricity flows through the circuit. It’s a hands-on way to explore the principles of electrical flow and conductivity.
Key Concepts Learned
This activity teaches kids about the difference between insulators and conductors. It also introduces schematic diagrams, which are used to design electrical systems. Compare this to home wiring systems to show real-world applications.
You can also introduce Ohm’s Law basics, explaining how voltage, current, and resistance work together. For older kids, discuss careers in electrical engineering and how these principles are used in designing technology.
This project connects creativity with science, making learning both fun and impactful. It’s a great way to spark curiosity about how everyday devices work.
10. “CandyNA” – Make A Candy DNA Model
What if you could explore the building blocks of life using candy? This hands-on activity lets kids create a model of DNA, the molecule that carries genetic information. It’s a sweet way to learn about heredity, chromosome structure, and the science behind what makes us unique.
Materials Needed
Gather these items: licorice sticks, colored marshmallows or gummy bears, toothpicks, and a diagram of the DNA double helix. These materials represent the sugar-phosphate backbone and nitrogenous bases of DNA.
Steps to Create
First, use the licorice sticks to form the backbone of the DNA model. Next, attach the marshmallows or gummy bears to the toothpicks, representing the base pairs. Connect the toothpicks to the licorice sticks, following the base-pairing rules (A-T, C-G). Twist the model to mimic the double helix shape of DNA.
Key Concepts Learned
This activity teaches kids about the genetic code and how traits are inherited. It introduces the structure of chromosomes and the role of DNA in life. You can also discuss CRISPR technology, a revolutionary tool for editing genes, and explore the ethics of genetic testing.
Extend the learning by creating a family tree to show how traits are passed down through generations. This project connects concepts in biology with real-world applications, making it both educational and fun.
11. Rainbow in a Jar
Have you ever seen a rainbow form right in your kitchen? This simple yet fascinating experiment uses everyday liquids to teach kids about density gradients and immiscible liquids. It’s a colorful way to explore science and chemistry while creating a stunning visual effect.
Materials Needed
To get started, gather these items: honey, dish soap, water, olive oil, rubbing alcohol, and food coloring. You’ll also need a clear glass jar or tall glass to layer the liquids.
Steps to Create
First, pour honey into the jar as the bottom layer. Next, slowly add dish soap, followed by water mixed with food coloring. Carefully pour olive oil, then rubbing alcohol on top. Each liquid should form a distinct layer without mixing.
Watch as the liquids stack, creating a rainbow effect. This happens because each liquid has a different density, causing them to separate. The result is a beautiful, layered jar that demonstrates key concepts in science.
Key Concepts Learned
This activity teaches kids about density gradients and how immiscible liquids interact. It also introduces the concept of meniscus formation, where liquids curve at the surface. These principles are used in oceanography to study water layers and in kitchens to make salad dressings.
You can extend the learning by introducing a hydrometer, a tool used to measure liquid density. Compare this experiment to real-world applications, like oil spills or layered drinks. It’s a hands-on way to explore the science behind everyday phenomena.
12. Inflation Station
Ever wondered how a simple chemical reaction can create something extraordinary? This experiment lets kids explore the fascinating world of acid-base reactions and gas production. Using everyday materials, they’ll witness how mixing acids and bases can inflate a balloon, making science both fun and educational.

Materials Needed
To get started, gather these items: a plastic bottle, vinegar, baking soda, a balloon, and a funnel. These materials are easy to find and perfect for creating a bubbling reaction that inflates the balloon.
Steps to Create
First, pour vinegar into the plastic bottle, filling it about one-third full. Next, use the funnel to add baking soda into the balloon. Carefully stretch the balloon over the bottle’s opening, ensuring it’s secure. Lift the balloon to let the baking soda fall into the vinegar. Watch as the mixture bubbles and inflates the balloon!
Key Concepts Learned
This activity teaches kids about acid-base reactions and how they produce carbon dioxide gas. It introduces concepts like stoichiometry, the study of chemical reactions and their proportions. You can also discuss the environmental impact of CO2 and compare this reaction to volcanic eruptions, which release gases into the atmosphere.
For a culinary connection, explore the difference between baking powder and baking soda. Baking powder contains both an acid and a base, while baking soda needs an acid (like vinegar) to react. This experiment connects chemistry to everyday life, making learning both engaging and impactful.
13. Walking Water
Have you ever watched water move on its own, defying gravity? This simple yet fascinating experiment demonstrates capillary action, a fundamental principle in physics and science. Using just a few everyday materials, you can create a colorful display that teaches kids how water travels through tiny spaces.
Materials Needed
To get started, gather these items: clear plastic cups, water, food coloring, paper towels, and a flat surface. These materials are easy to find and perfect for creating a hands-on learning experience.
Steps to Create
First, fill three cups with water and add different colors of food coloring to each. Place the cups in a row, leaving an empty cup between them. Fold paper towels into strips and place one end in a colored cup and the other end in the empty cup. Watch as the colored water “walks” along the paper towels, filling the empty cup with a new color.
Key Concepts Learned
This activity teaches kids about capillary action, the process where water moves through small spaces due to adhesion and cohesion. It also introduces color theory, as the colors mix to create new shades. Compare this to how trees transport water from roots to leaves or how wicking fabrics draw moisture away from the skin.
For a historical connection, discuss Leonardo da Vinci’s studies of water movement. This experiment connects concepts in science to real-world applications, making learning both fun and impactful.
14. Crystal Names
Ever thought about creating something as unique as your name using crystals? This activity combines science and creativity, allowing kids to explore molecular geometry and mineral formation while crafting personalized crystal names. It’s a hands-on way to learn about solution saturation and the beauty of crystallization.
Materials Needed
To get started, gather these items: pipe cleaners, borax powder, a glass jar, boiling water, and string. Pipe cleaners will form the letters of the name, while borax creates the solution needed for crystal growth.
Steps to Create
First, shape the pipe cleaners into the letters of your name. Tie them to a string and suspend them inside the jar. Next, mix borax powder into boiling water until it dissolves. Pour the solution into the jar, ensuring the letters are fully submerged.
Let the jar sit undisturbed for 24 hours. As the water cools, crystals will form on the pipe cleaners. Once dry, your crystal name is ready to display!
Key Concepts Learned
This activity teaches kids about solution saturation and how crystals form through molecular bonding. It introduces the concepts of molecular geometry and mineral formation, which are essential in chemistry and geology.
You can also discuss gemology, the study of gemstones, and how crystals like Swarovski are used in art and jewelry. For a historical connection, explore how salt crystallization has been used for centuries in food preservation.
This project connects creativity with science, making learning both fun and impactful. It’s a great way to spark curiosity about the natural world and its processes.
15. Make Your Own Rain Clouds
What if you could simulate rain clouds right in your kitchen? This simple experiment brings the science of weather into your home. Using everyday materials, you can create a model of rain clouds and explore how precipitation works.
Materials Needed
Gather these items: a clear glass jar, shaving cream, blue food coloring, and water. These materials mimic the conditions needed for cloud formation and precipitation.
Steps to Create
First, fill the jar about three-quarters full with water. Next, add a layer of shaving cream on top to represent the cloud. Slowly drop blue food coloring onto the shaving cream. Watch as the color seeps through, simulating rain falling from the cloud.
Key Concepts Learned
This activity teaches kids about the water cycle and how clouds form. It introduces the role of humidity and condensation in weather patterns. You can also discuss how this process connects to agriculture and environmental science.
For a deeper dive, explore how meteorologists predict weather using similar principles. This experiment is a hands-on way to understand the science behind everyday weather phenomena.
16. Apple Oxidation
Have you ever noticed how apples turn brown after being sliced? This simple yet fascinating process is a great way to explore the science behind enzymatic reactions. Using everyday materials, you can learn why apples oxidize and how to slow it down.
Materials Needed
To get started, gather these items: an apple, a knife, lemon juice, water, and a plate. These materials are easy to find and perfect for observing the oxidation process.
Steps to Create
First, slice the apple into several pieces. Place one slice on the plate as a control. Dip another slice in lemon juice and place it next to the control. Repeat with water for a third slice. Observe the slices over time to see how they change.
Key Concepts Learned
This activity teaches kids about enzymatic browning and how antioxidants like vitamin C can slow it down. It introduces the role of polyphenols in chemistry and their health benefits. You can also discuss commercial anti-browning agents used in food preservation.
For a historical connection, explore how ancient cultures preserved food using natural methods. This experiment connects life science to everyday practices, making learning both fun and impactful.
17. Gumdrop Bridge Building Game
What if you could combine creativity and science to build something sturdy and functional? The Gumdrop Bridge Building Game is a hands-on activity that introduces kids to the principles of engineering and physics. Using simple materials, they’ll explore how tension and compression forces work together to create strong structures.
Materials Needed
To get started, gather these items: gumdrops, toothpicks, and a flat surface. Gumdrops act as connectors, while toothpicks serve as the beams. These materials are easy to find and perfect for creating a functional bridge model.
Steps to Create
First, plan the bridge design. Will it be a beam bridge, arch bridge, or truss bridge? Next, use gumdrops and toothpicks to build the base. Add layers to strengthen the structure, ensuring it can hold weight. Finally, test the bridge by placing small objects on it to see how much it can support.
Key Concepts Learned
This activity teaches kids about tension and compression forces, which are essential in physics and engineering. It also introduces the concept of structural efficiency, showing how different designs handle weight. Compare your bridge to famous ones like the Golden Gate Bridge to see how real-world engineers solve these challenges.
For older kids, discuss modern materials like carbon fiber and how they’re used in construction. You can also explore architecture software parallels, which help engineers design and test structures virtually. This project connects creativity with real-world applications, making learning both fun and impactful.
18. Mini Water Cycle
What if you could recreate the journey of water from clouds to rivers in your own home? This simple experiment brings the science of the hydrologic cycle to life. Using everyday materials, you can teach kids how water moves through nature in a continuous loop.
Materials Needed
Gather these items: a clear plastic bag, water, a marker, and tape. These materials are easy to find and perfect for creating a mini water cycle model.
Steps to Create
First, pour a small amount of water into the plastic bag. Seal the bag tightly, leaving some air inside. Use the marker to draw a sun and clouds on the outside of the bag. Tape the bag to a sunny window and observe over the next few days.
As the sun heats the water, it will evaporate and condense on the sides of the bag, simulating rain. This process mimics the natural water cycle, showing how water moves from the ground to the sky and back again.
Key Concepts Learned
This activity teaches kids about the hydrologic cycle and the role of solar energy in driving it. It introduces the concepts of evaporation, condensation, and precipitation. You can also discuss the impact of droughts and the importance of water conservation.
For a global perspective, explore how water is distributed across the planet. This experiment connects science to real-world environmental issues, making learning both fun and impactful.
19. Hot Ice Experiment
Have you ever seen ice form instantly from a liquid? The Hot Ice Experiment is a fascinating way to explore the science behind supercooling and exothermic reactions. Using everyday materials, you can create a stunning visual effect that teaches kids about the principles of chemistry in a hands-on way.

Materials Needed
To get started, gather these items: sodium acetate, water, a saucepan, a glass jar, and a spoon. Sodium acetate is the key ingredient that makes this experiment work, and it’s easy to find in most stores.
Steps to Create
First, dissolve sodium acetate in water in the saucepan. Heat the mixture until it becomes a clear solution. Pour the solution into the glass jar and let it cool to room temperature. Once cooled, add a small crystal of sodium acetate to the jar. Watch as the liquid instantly turns into solid ice!
Key Concepts Learned
This activity teaches kids about supercooling, where a liquid remains in liquid form below its freezing point. It also introduces exothermic reactions, which release heat as the liquid turns into ice. These concepts are used in industrial applications like road de-icing and phase change energy storage.
For older kids, discuss the difference between endothermic and exothermic reactions. This experiment connects science to real-world applications, making learning both fun and impactful.
20. Stick Raft
What if you could build a floating structure using just sticks and string? This hands-on activity introduces kids to the principles of engineering and physics while teaching them about buoyancy and structural stability. It’s a fun way to explore how materials interact with water and how designs can impact performance.
Materials Needed
To get started, gather these items: small sticks or twigs, string or rubber bands, and a container of water. These simple materials are perfect for creating a functional raft that can float and carry small objects.
Steps to Create
First, arrange the sticks in a flat, rectangular shape. Use string or rubber bands to tie the sticks together at the corners, ensuring the raft is sturdy. Test the raft by placing it in water and adding small objects to see how much weight it can hold. Adjust the design if needed to improve stability.
Key Concepts Learned
This activity teaches kids about buoyancy, the force that allows objects to float. It also introduces the concepts of material density and structural stability. You can discuss how these principles are used in marine engineering to design boats and rafts.
For a historical connection, explore famous exploration rafts like the Kon-Tiki, which crossed the Pacific Ocean. You can also discuss the environmental impact of using natural materials and how modern designs prioritize sustainability. This project connects creativity with real-world applications, making learning both fun and impactful.
Conclusion
Bringing science and creativity together can transform everyday moments into unforgettable learning experiences. These activities not only build essential skills but also strengthen family bonds, making them a valuable addition to your routine.
Encourage your children to keep exploring with resources like Big Bang STEAM’s 500+ lessons or I’m the Chef Too!, which blends cooking with STEM. Local science centers and museums also offer fantastic opportunities for hands-on discovery.
Share your project photos online to inspire others and celebrate your fun experiments. Stay tuned for upcoming seasonal activities that will keep the excitement alive all year round.
Remember, these experiences can spark a lifelong passion for science and innovation. Who knows? Your child might just be the next great inventor or engineer!
FAQ
Why are these activities beneficial for children?
These activities help kids explore science, engineering, and math concepts in a fun, hands-on way. They encourage creativity, problem-solving, and critical thinking while using everyday household items.
What materials are commonly used in these projects?
Most projects use simple items like paper, straws, balloons, magnets, and water. These are easy to find at home, making the activities accessible and budget-friendly.
How do these activities teach the water cycle?
Projects like Cloud in a Jar and Mini Water Cycle visually demonstrate how water evaporates, condenses, and precipitates, helping kids understand this natural process.
Can these activities be done without prior experience?
Absolutely! Each project includes clear steps and uses basic materials, making them perfect for beginners. Parents and educators can easily guide children through the process.
What physics concepts can kids learn from these projects?
Activities like Building a Balloon Car and Paper Rocket teach principles of motion, force, and energy, making physics engaging and relatable.
Are these experiments safe for young children?
Yes, all activities are designed with safety in mind. However, adult supervision is recommended, especially when using items like hot water or magnets.
How do these projects promote environmental awareness?
Activities like Rainbow in a Jar and Walking Water highlight the properties of liquids and the importance of water, fostering a deeper appreciation for the environment.
Can these projects be done in groups?
Definitely! Many activities, such as Gumdrop Bridge Building Game, encourage teamwork and collaboration, making them great for classrooms or playdates.
What chemistry concepts are explored in these experiments?
Projects like Magnetic Slime and Hot Ice Experiment introduce kids to chemical reactions, polymers, and the states of matter in an interactive way.
How can parents make these activities more educational?
Parents can ask questions, discuss the key concepts, and encourage kids to predict outcomes before starting. This enhances learning and keeps children engaged.